

I found this cute little jar at Walmart
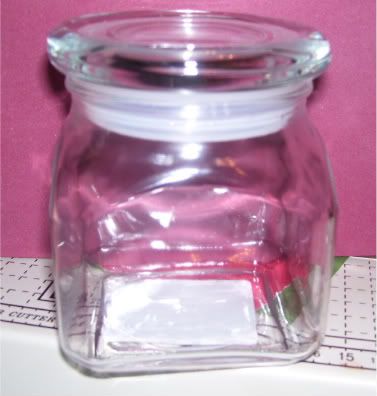
and just had to see what I could do with it. Orginally, I was going to decorate it in Vinyl. But.. then a lightbulb went off and I thought I'd give it a shot and try Glass Etching!
I wondered Hobby Lobby, with my 25% off coupon in hand, looking for etching cream. It was in the aisle with the candle making supplies and the mosaic tiles. It was $8.50 for 3 oz. And then 25% off of that. So, $6.38 total.

I wanted flowers and butterflies, cause they are pretty. So I lined them up in DS so that they would fit on the sides of my jar. And then I cut it out on Vinyl. Vinyl was ordered from Ebay Seller Rice892.
I cut the vinyl into squares after it was done cutting, and then I removed it from my mat. I used a craft knife to cut it while on the mat. Here's a picture of the images
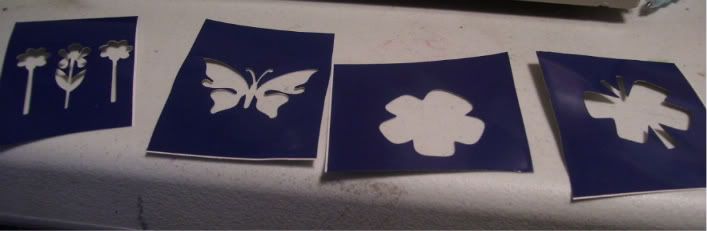
The first flowers are from Walk in my Garden, the butterfly is Indie Art, and the other flower and butterfly are also Walk in my Garden.
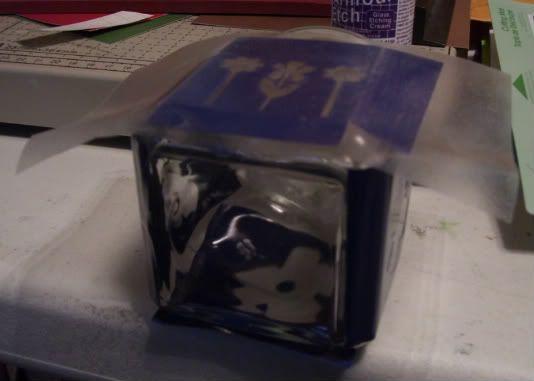
Using Transfer Tape, I put the images on my jar.
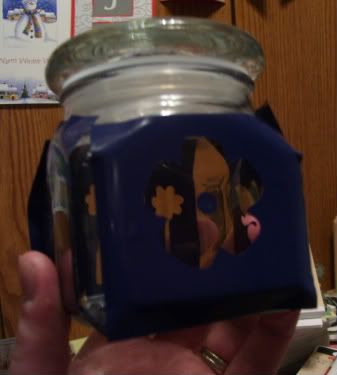
All images on Jar
Then, of course I couldn't find my stash of paint brushes, so I used a foam brush instead - it worked great!
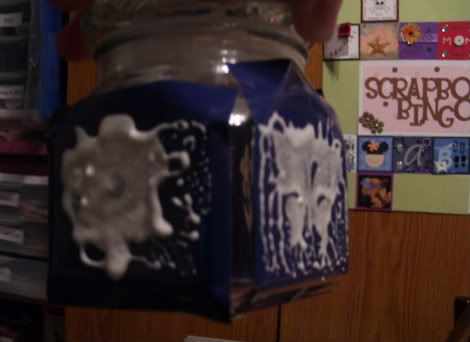
Just be careful that you stay on your vinyl.. it will etch any glass, but doesn't hurt the vinyl or etch through it.
The directions on the cream say to let it sit for 5 minutes. I know I let it sit longer cause I lost track of time. It may have been 10 minutes or so. Then, wash it off. I took it into the bathroom and using a wash cloth, I wiped it down .
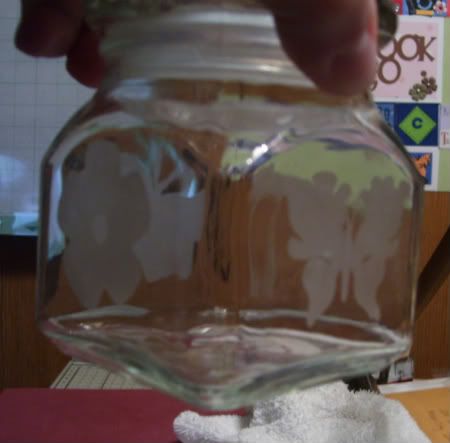
Then, let it dry. and Whal-la! You've etched!
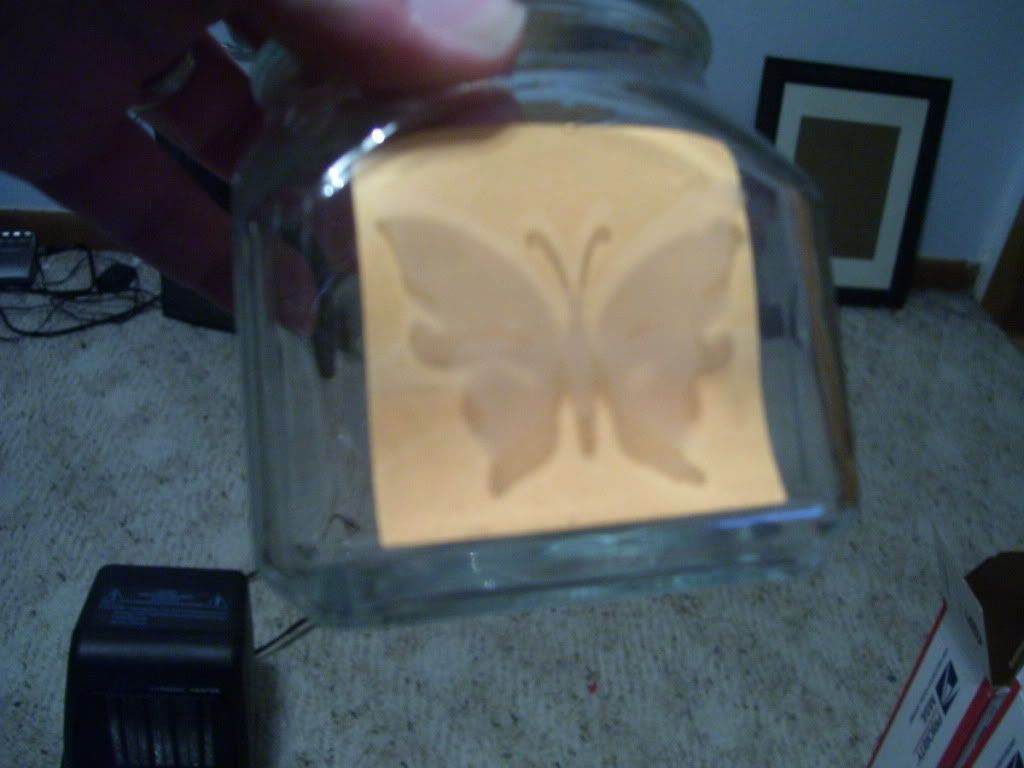
Here's with paper behind it so that it can be seen better
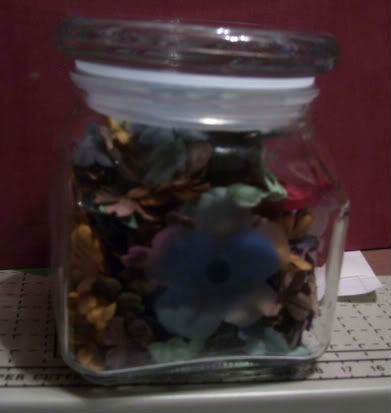
And.. then I put my primas in there! Looks beautiful!

and just had to see what I could do with it. Orginally, I was going to decorate it in Vinyl. But.. then a lightbulb went off and I thought I'd give it a shot and try Glass Etching!
I wondered Hobby Lobby, with my 25% off coupon in hand, looking for etching cream. It was in the aisle with the candle making supplies and the mosaic tiles. It was $8.50 for 3 oz. And then 25% off of that. So, $6.38 total.

I wanted flowers and butterflies, cause they are pretty. So I lined them up in DS so that they would fit on the sides of my jar. And then I cut it out on Vinyl. Vinyl was ordered from Ebay Seller Rice892.
I cut the vinyl into squares after it was done cutting, and then I removed it from my mat. I used a craft knife to cut it while on the mat. Here's a picture of the images

The first flowers are from Walk in my Garden, the butterfly is Indie Art, and the other flower and butterfly are also Walk in my Garden.
Using Transfer Tape, I put the images on my jar.

All images on Jar

Then, of course I couldn't find my stash of paint brushes, so I used a foam brush instead - it worked great!

Just be careful that you stay on your vinyl.. it will etch any glass, but doesn't hurt the vinyl or etch through it.
The directions on the cream say to let it sit for 5 minutes. I know I let it sit longer cause I lost track of time. It may have been 10 minutes or so. Then, wash it off. I took it into the bathroom and using a wash cloth, I wiped it down .
Then, let it dry. and Whal-la! You've etched!

Here's with paper behind it so that it can be seen better

And.. then I put my primas in there! Looks beautiful!


17 comments:
Well isn't that too cool!!! Great idea for your primas :)
Those are great! Thanks for the instructions. The husband saw the pirate-y ones you shared and asked about the process, so I navigated here to check it out. *grin* He also had a question: Can you re-use the vinyl? I figured since it doesn't hurt the vinyl you could, but better to ask and know then guess. :)
If you peel it off very gently.. Yes, you can reuse the vinyl. The Transfer tape is also reusable :)
This is a wonderful visual example with great instructions---thank you for sharing! I think you've inspired me to try something new, too!
XO Char
wow this is so beautiful, need to look around for this in Holland. It is also great to give as a gift.
thanks for showing.
Hug Linda
This is fantastic thank you very much for tutorial will need to try it
Thanks for showing us your beautiful etchings. I have wanted to try this and have the equipment, but I haven't been brave enough to dive in. Thanks for the inspiration!! Beautiful jar!!!!!!
Holey moly...that is adorable! Thanks so much for inspiring me!
that is totally gorgeous!! thankyou so much for the pictures, i have been wondering how people do that, it looks so pretty xxxxx
You have the best tutorial I have seen yet! I have been wanting to try this out and you have shown it exactly how I thought it would work, I can't wait to go do it!!
Thank yo!
Super fun! I keep thinking about etching, but have yet to buy the cream and give it a go!
This is so beautiful! I've always wanted to try glass etching, but for some reason I'm afraid of it!
Thanks for the great tutorial and I love that it is so easy and looks very fancy!
Looks great. Wonderful tutorial. Been meaning to try this as well, but now more motivated...
okay so I know I am making this harder than it is. HELP! I have cut the letters I want there is a white film on the back of the vinyl do I take it off? Do I leave it on? Where do i apply the transfer tape?
Thanks
Andrea
I love etching cream! You know you can also use contact paper (much cheaper)!! Great job and I'm sure they'll love them! I know I would!
I had been too intimidated to try etching, but your easy-to-follow tutorial has convinced me to try. Thanks!
Post a Comment